September ‘25
Another month has come and gone, and we’re already well into the next one! I thought it might be interesting to use this post to go over the visual style of my game and break it down for you, so I took a few extra days to write this up.
***
When I'm working on a model in Blender—which I happen to be doing right now, so let's use it as an example—I'm constantly jumping between two different textures and two different UV maps. One is for the base texture of the object, and the other is for the shading. Here you can see both of them on a brick wall: Shading on the left, base on the right.

I call the shading texture the AO map. AO stands for ambient occlusion, which is basically what I’m trying to mimic the look of by doing this. Depending on the object, I use one of these two textures below for my AO map. Large objects such as walls use the asymmetrical gradient texture on the right, and just about everything else uses the squarey texture on the left. I go over the model and map the AO texture, essentially shading the object manually.

You may have noticed that the brick texture for the wall is also grayscale, and the same goes for every other texture that I use. Using a color image for the base texture won't necessarily break anything, but it makes this next part of the process cleaner & easier to control.
After the model is done, I export it from Blender into Godot and use a custom shader to mix the two textures and assign colors to the mix. The logic of the shader is simple: take the two textures (base & shading) and average the color of each pixel, so the base texture is essentially getting tinted by the shading texture depending on where that face was plotted on the AO map in Blender. Then, the color of each pixel is measured. Depending on where it falls between totally white and totally black, it's assigned one of five colors on a palette of my choosing.
(I should note here that the AO textures actually being used in the engine are transparent, not white, so the black you see above gradually getting lighter is ACTUALLY black gradually losing its alpha channel. I just use those black & white versions for the sake of visibility in Blender)
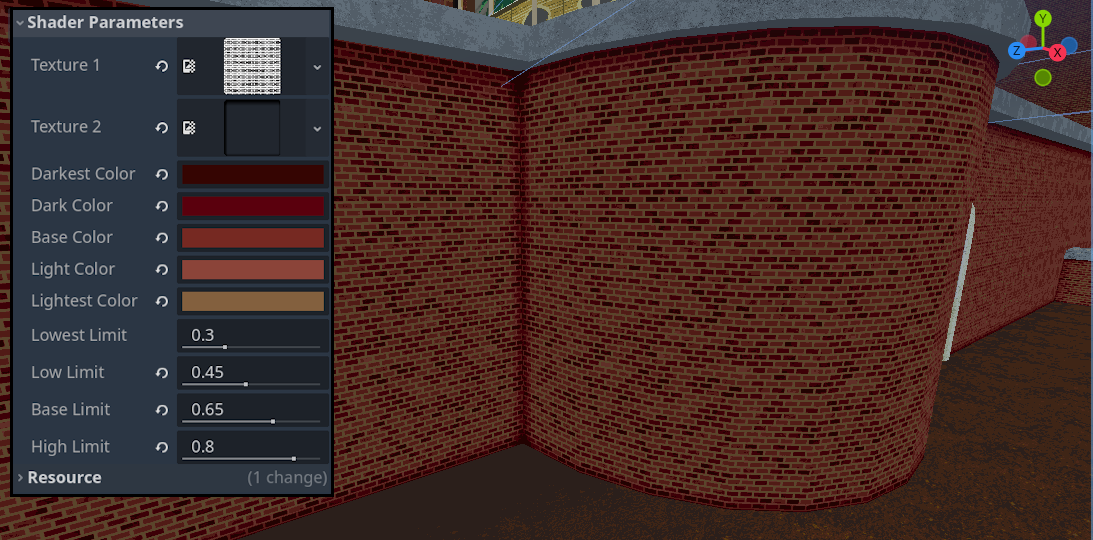
I also have sliders to fine-tune the cutoffs of the levels between each color. Generally, the colors are similar in hue, and progress from darkest to lightest. Sometimes though, like with these bricks, I have to get a little creative with the colors and textures—which reminds me! Most of the textures that I use are ones I made for myself in a great, free-to-use, made-in-Godot piece of software called Material Maker. Check it out if you’re interested!
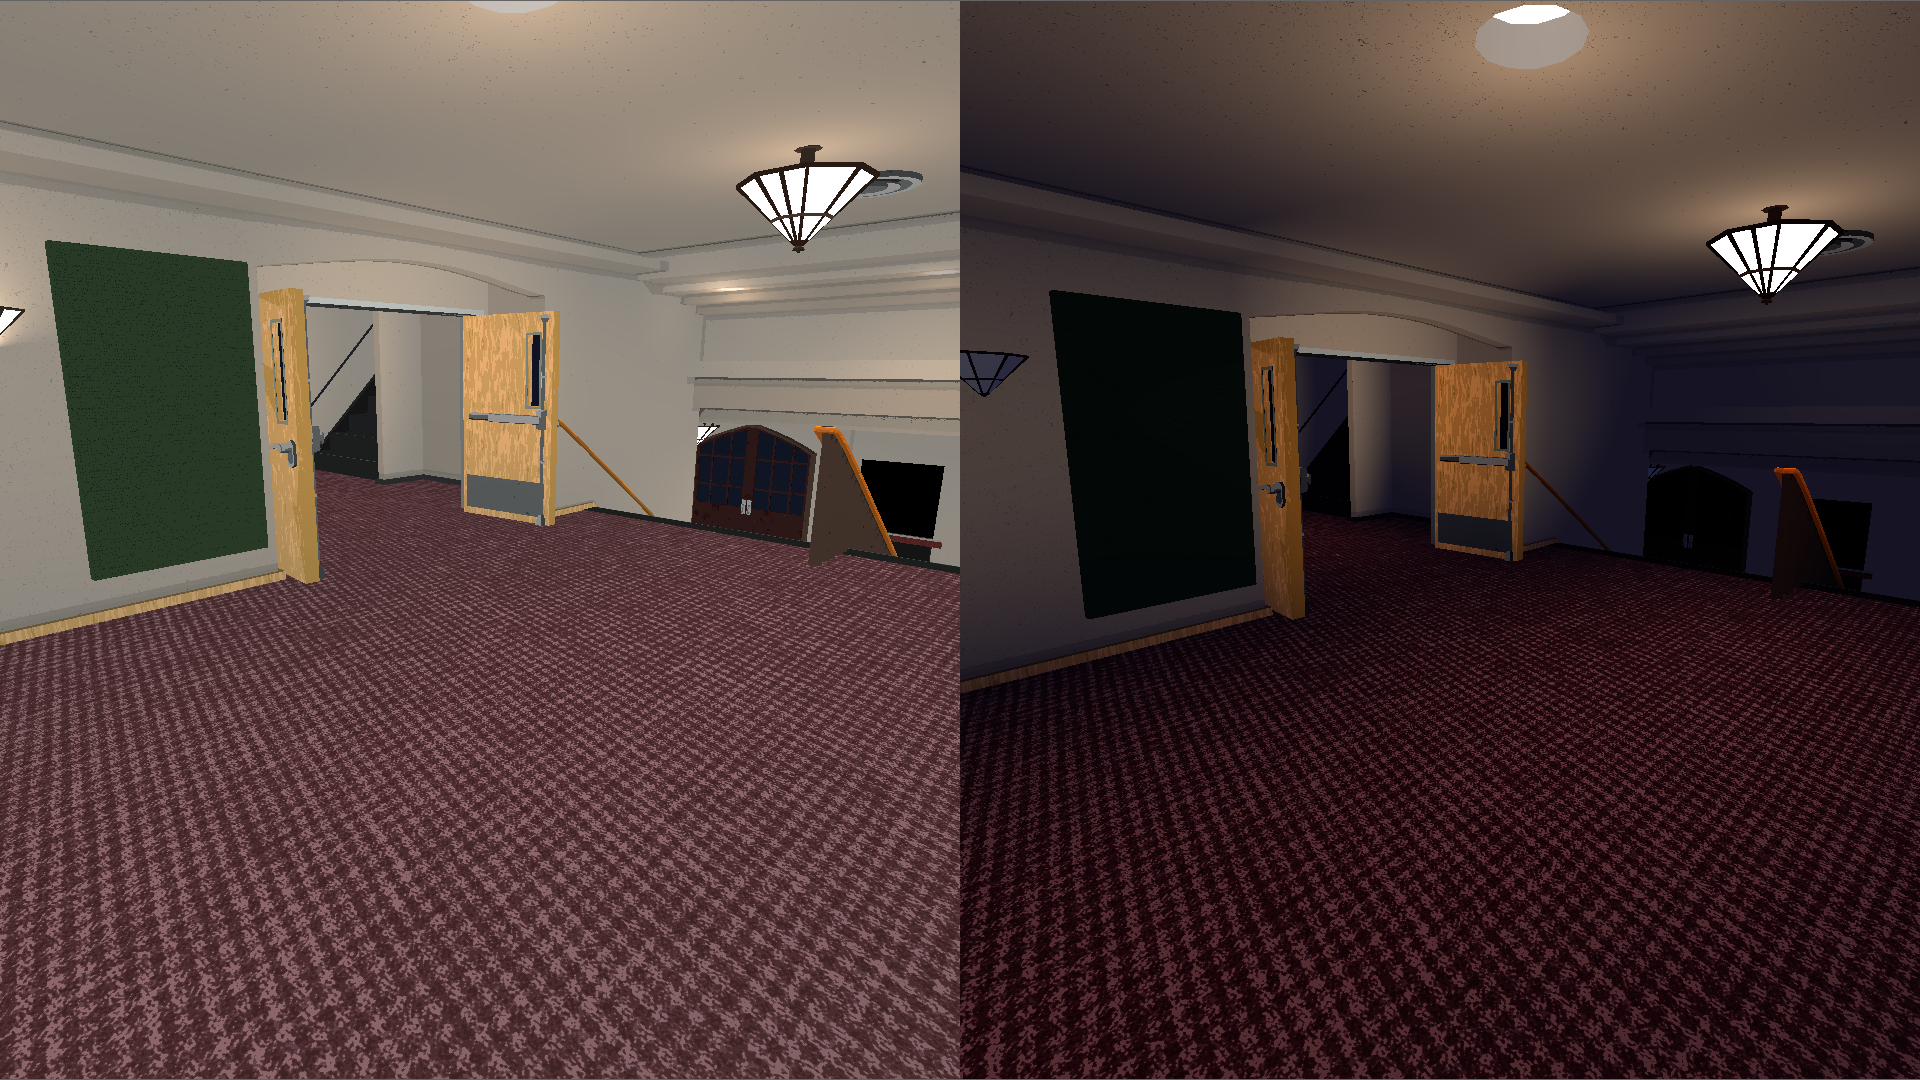
What you see above is what I see in the editor, and not the finished product. It’s still missing something important, and that something is the lighting! Lighting plays a huge role in the end of this process, so I suppose we should touch on that as well.
There are two main aspects to discuss with the lighting. The first is what you’d expect: providing light to illuminate things, duh. The only important note to make here is that I’ve disabled specular lighting on my models. Specular lighting basically adds more light to parts of the mesh directly facing a light source. I never like how this looks in video games, so my meshes don’t do this. PROXIMITY still matters, though: parts of the mesh closer to the light source will receive more light than parts further away, but this is with zero regard to the DIRECTION of that particular part of the mesh.
The other important element that the lighting provides, ironically, is darkness!
What exactly does that mean? Well, what we’ve been discussing so far about lighting is in reference to the individual light sources in the game world—OmniLight3D and SpotLight3D nodes, if you know your Godot. Now, however, I’m talking about the game’s ambient light. According to the Godot docs, ambient light is light that “affects every piece of geometry with the same intensity. It is global and independent of lights that might be added to the scene.” Adjusting this light source can lead to some pretty dramatic changes, and I’m trying to use that to my advantage. You can see below on the left what the first floor lobby looks like with default, neutral ambient light—daytime, basically. On the right is what it looks like when that ambient light has its energy reduced and the color is changed to a deep indigo—nighttime!
So that’s pretty much everything that goes into making the game look the way that it does—or at least, all the broad strokes I feel like talking about right now. Figuring out a style for myself early on in the development process was an important goal for me, despite being against conventional wisdom. I also wanted to make sure that, as a novice, I could make a 3D environment look good and run well without taxing the computer’s hardware too much. Ultimately I’m glad I frontloaded a lot of that work, because it’s allowed me to refine it further over the past couple of years.
***
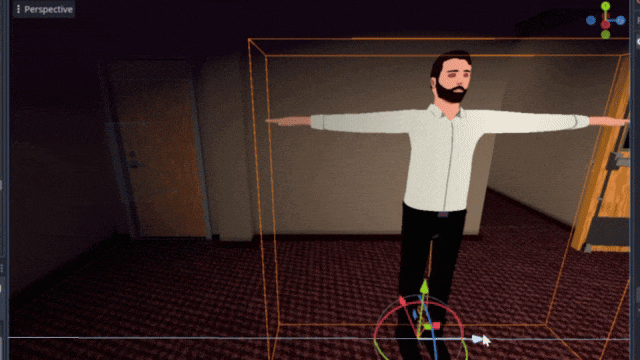
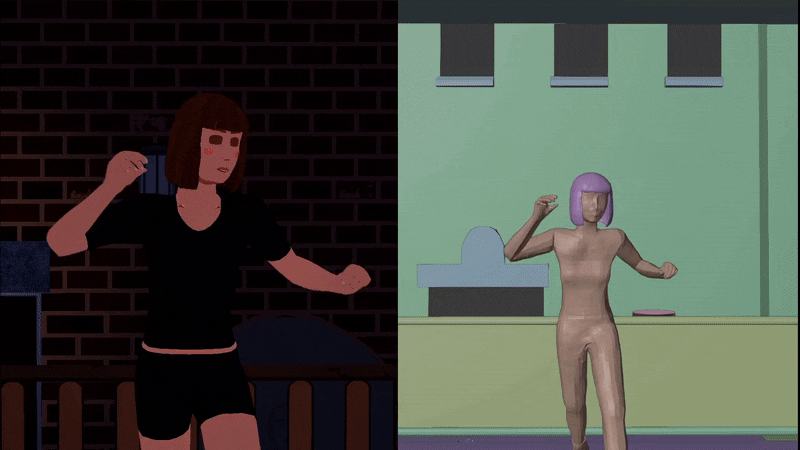
In other news, in addition to recording more animations, I made some progress figuring out how to animate hair properly. This would have been a lot easier to do if time manipulation wasn’t a game mechanic—which is a sentence I’ve found myself repeating constantly for the past three years, in a thousand different situations.
In this particular situation, I could rig up some dynamic hair using soft body physics in the game engine, however, those soft body simulations happen in real time, and I wouldn’t be able to properly reverse them along with everything else in the game. So, just like the rest of the character model, the hair is prepared and animated in Blender, and everything you see in the game is just a playback of that animation. That means I have to spend extra time creating bones on the character armature to animate the hair, then running some physics simulations on it in Blender. I then bake those physics to the animation and, finally, export it to Godot.
I also had to spend a couple of weeks tinkering around with the prop logic to allow for more complex interactions—such as having a cup in one hand and setting it down on a plate being held by the other hand. Behavior like this could typically be solved by reparenting objects from one node to another in Godot’s scene tree, but since those operations need to happen in real time, it’s prone to breaking as soon as you introduce time control as a mechanic for the player. So, repeat after me:
THIS WOULD HAVE BEEN A LOT EASIER TO DO IF TIME MANIPULATION WASN’T A GAME MECHANIC
THIS WOULD HAVE BEEN A LOT EASIER TO DO IF TIME MANIPULATION WASN’T A GAME MECHANIC
THIS WOULD HAVE BEEN A LOT EASIER TO DO IF TIME MANIPULATION WASN’T A GAME MECHANIC
But that’s never an excuse to give up! Especially when you’re the bozo who got yourself into this mess in the first place by convincing yourself how cool it would be to include time manipulation. So, I figured it out:
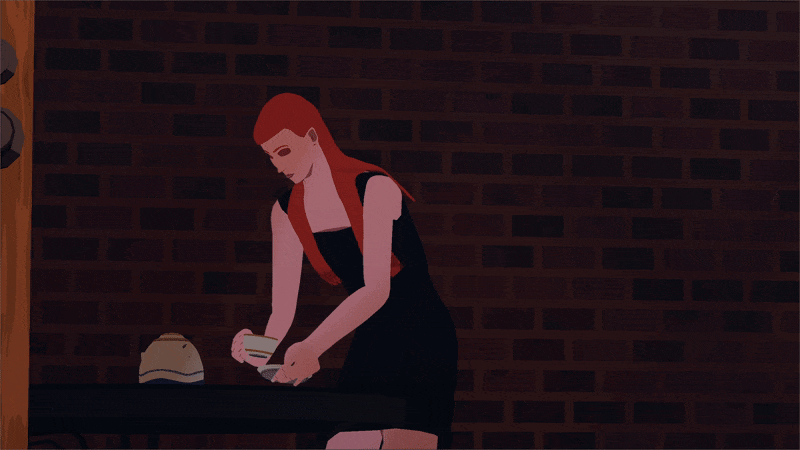
A lot of miniscule things in the animations I’ve made so far still need refining—like when her fingers are slightly clipping through the teacup—but I’m doing my best not to get hung up on every little detail right now. If I do that, then I’ll never see the end of this project. I figure once I’m about halfway through recording the story, I’ll allow myself to return to older scenes like this one. Until then, the goal is to make ACCEPTABLE animations, not PERFECT ones.
***
And that’s pretty much the gist of things. Still trying to work towards a trailer, but I really want to make that look good, so I’m being patient with myself in regards to that goal.
Until next time. Thanks for reading!
-Tim